
If you use multiple SIM/eSIMs, it’s easy to get confused about which one handles mobile data or calls. To avoid this, give each line a clear, recognizable name. You can update these names anytime through your phone’s «Settings». Below are instructions for renaming digital profiles on iPhones and Android smartphones.
How to Rename an eSIM on iPhone
You can enter a name when you first activate your TooSIM eSIM, but it’s also easy to rename the digital profile at any time. Open «Settings» on your Apple gadget, then:
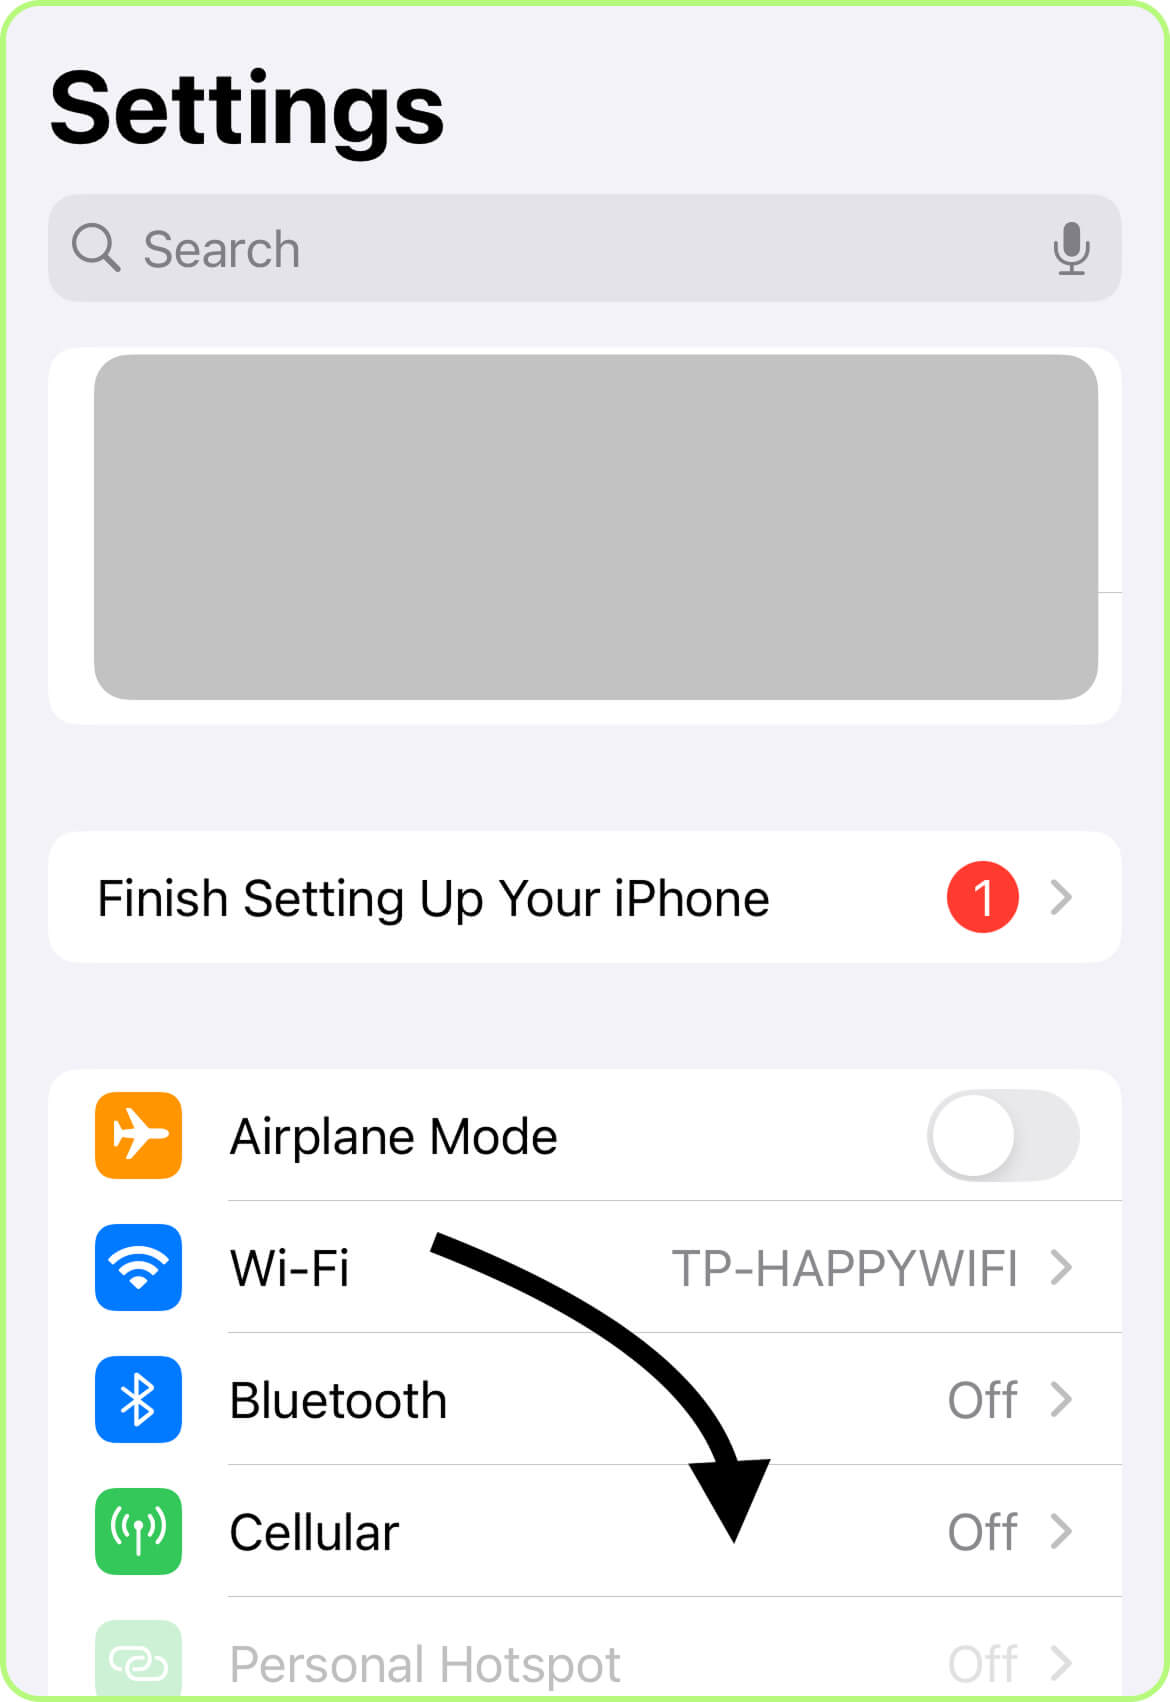
Run to «Cellular» (or «Mobile Data», depending on your model and iOS version).
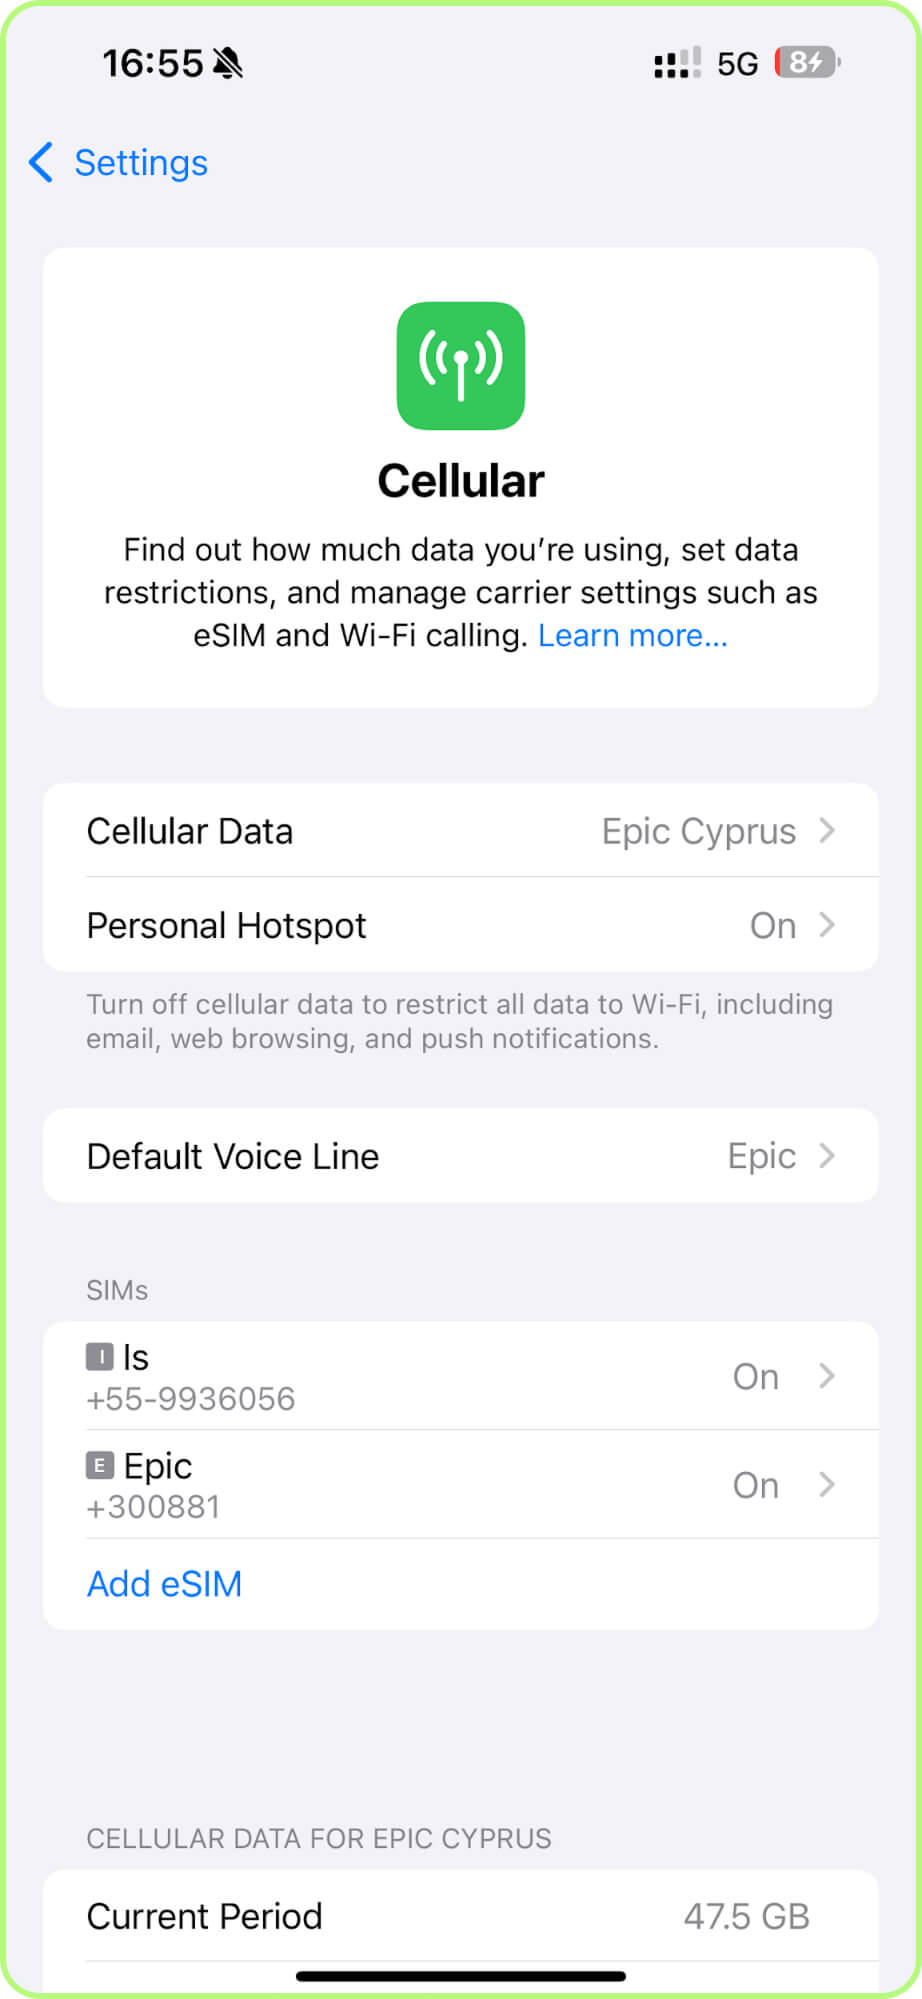
Under «SIMs», select the eSIM plan you want to change (by default, it may be labeled «Primary»/«Secondary», or «Travel»).
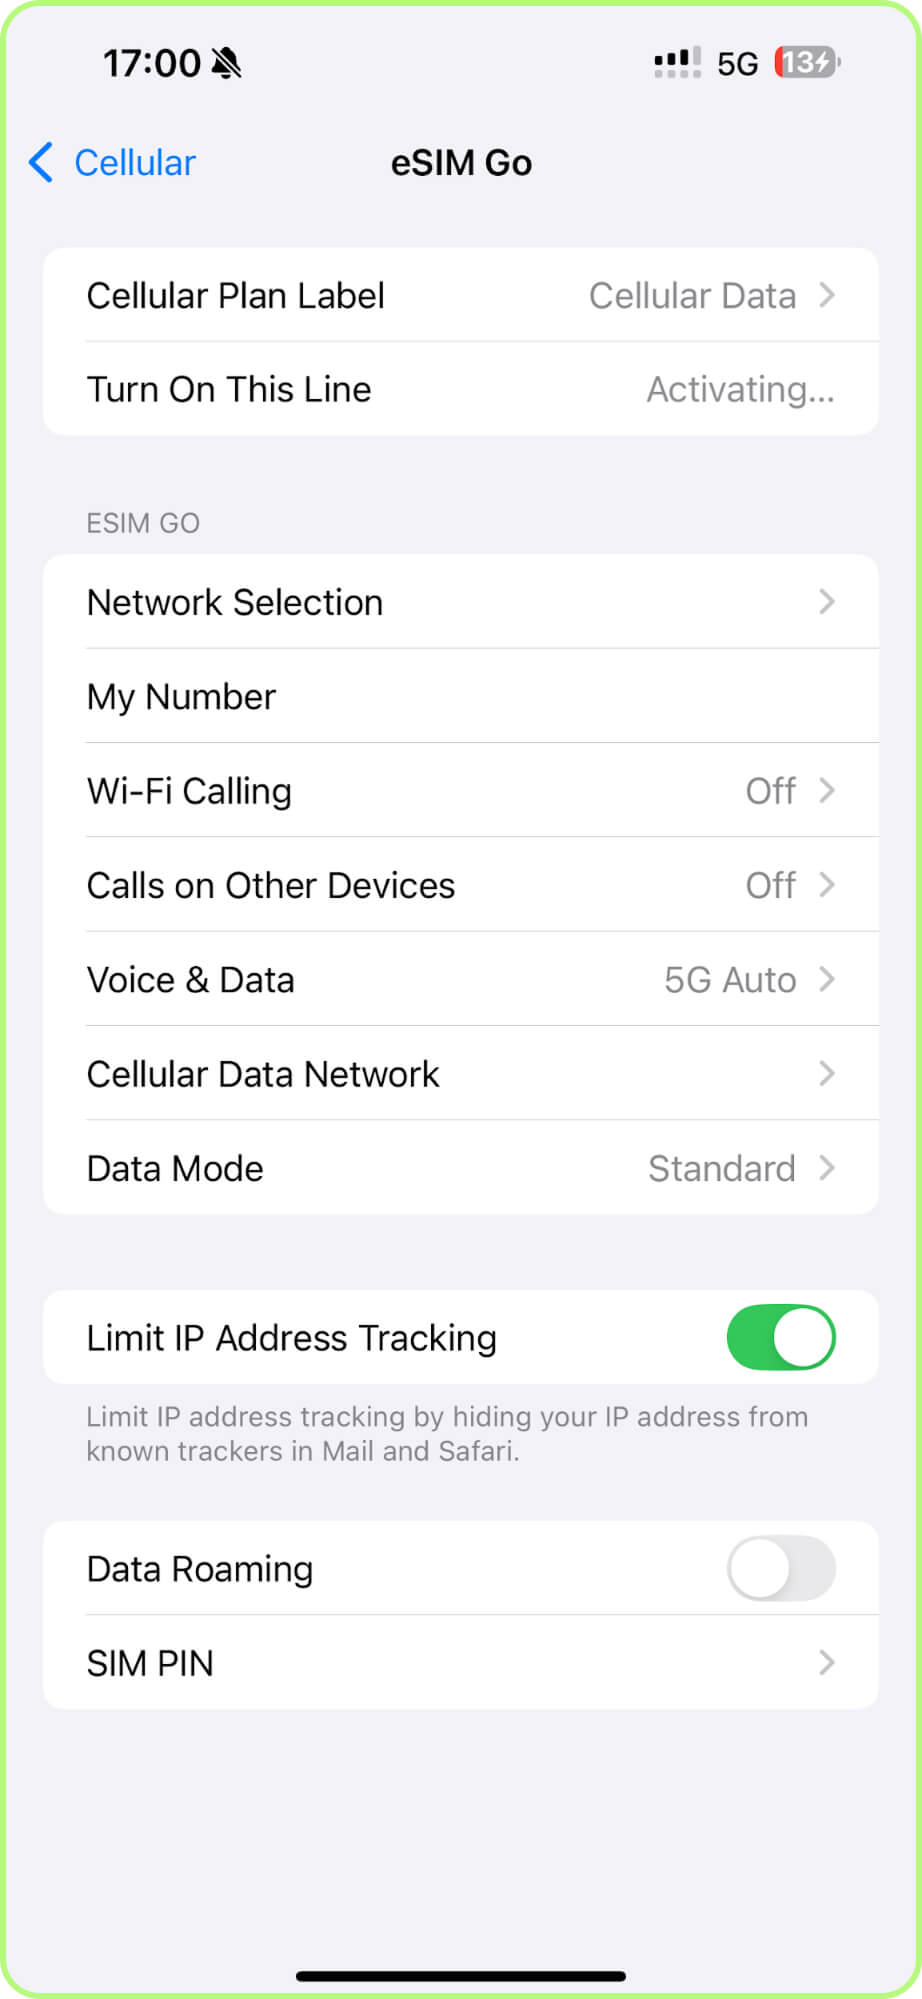
Choose «Cellular Plan Label».
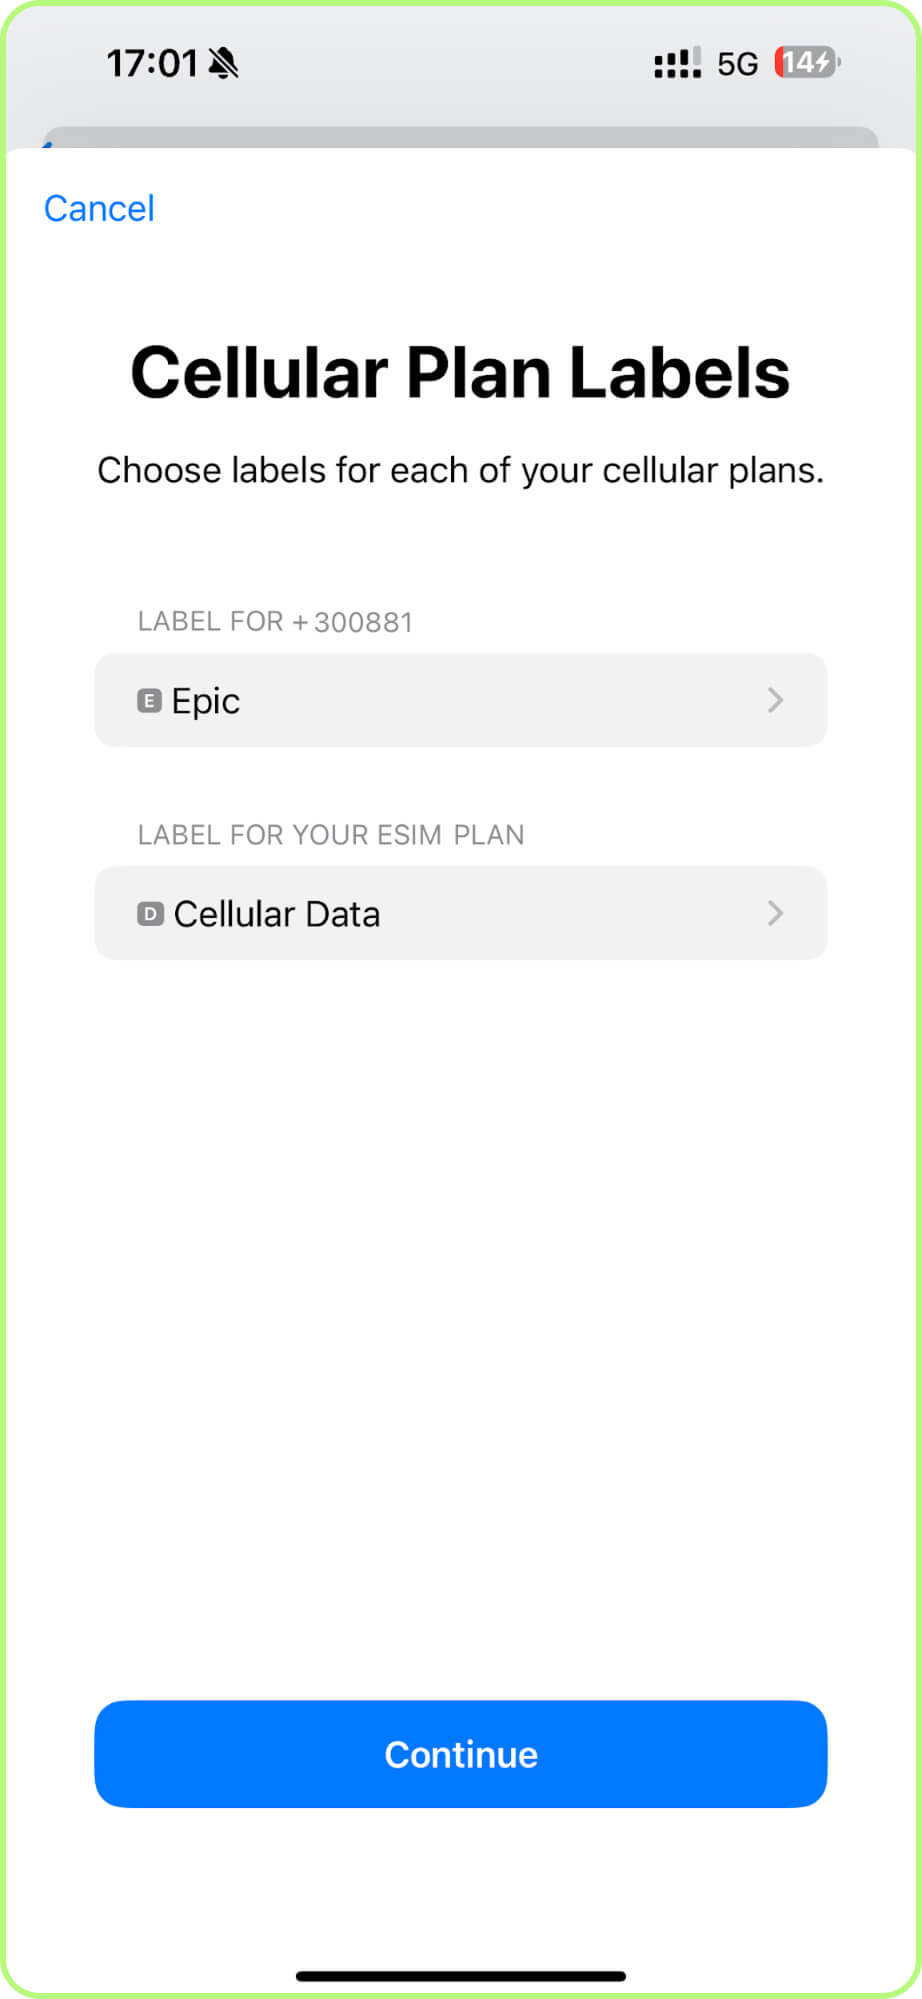
Select a preset label (for example, «Primary» or «Business») or select «Custom Label» to enter your own.
Type the new label and tap «Done».
Changes are saved automatically. There is no need to restart your phone.
How to Rename an eSIM on Android Smartphones
On Android phones your SIMs or travel eSIMs are often labeled by default as «SIM 1» or «SIM 2», which can easily confuse. You can rename your digital profile through «Settings». This universal guide works for Samsung, Huawei, and Google Pixel devices:
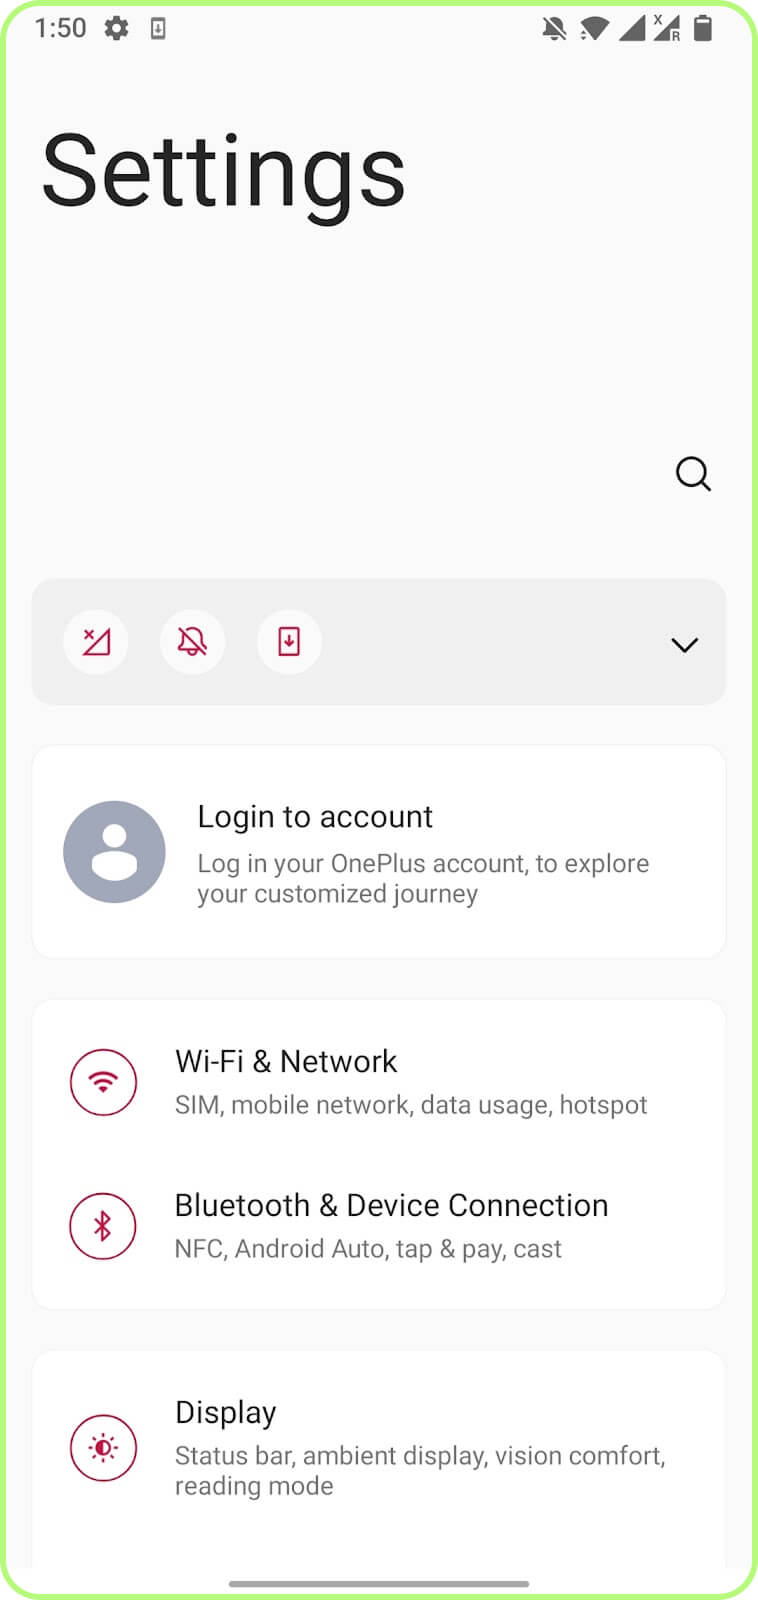
Go to «Wi-Fi & Network» or «Connections».
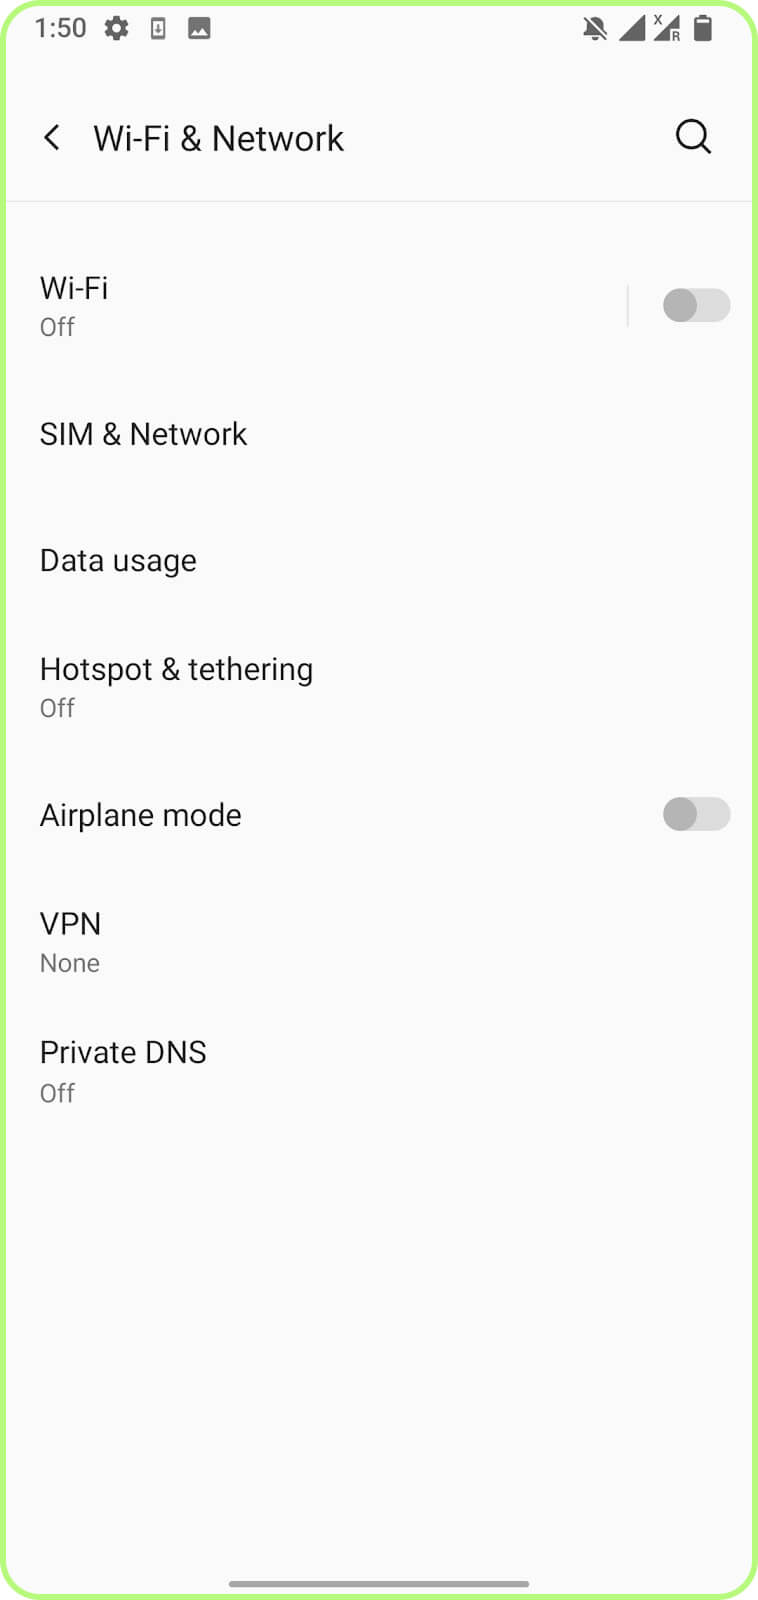
Select the «SIM & Network»/«SIM Manager».

Select the digital profile you want to rename.
Tap «SIM Name»/«Edit SIM name»/«Label».
Enter the new name, for example, «TooSIM eSIM», and save.
You can now close «Settings». All changes are saved automatically. If needed, you can rename the digital profile again at any time. This will not affect any of your settings.
Conclusion
Giving your eSIM a clear and memorable name makes managing your SIM cards much easier. You can do this in just a few clicks through «Settings» on iPhones or Android smartphones. There is no limit to the number of times you can rename your eSIM.